A pathogen is a microorganism such as a virus, bacterium, oomycete (water mould) or fungus which causes disease and/or death.ref Examples you might have heard of include Dutch Elm disease (caused by the fungus Ophiostoma ulmi), Horse Chestnut bleeding canker disease (caused by the bacterium Pseudomonas syringae v. aesculi), Ash dieback (caused by the fungus Hymenoscyphus fraxineus), Sudden Oak Death (caused by the oomycete Phytophthora ramorum) and mosaic viruses in vegetables.
The groups of pathogens causing forest tree diseases and their prevalence is shown in the chart below. 85% of these are fungi and the remainder are divided among bacteria, viruses, nemotodes (microscopic worms) and oomycetes. Oomycetes appear similar to fungi but are actually not genetically similar, and are classed in the Chromista kingdom.ref

Note that as they are not microorganisms, insects are not classified as pathogens, although they can also cause significant damage and death to trees. Insect damage is a subject for another post, but for this one, their main role is in introducing pathogens to trees by delivering microbes on them into wounds they create (this is called being a pathogen ‘vector’).
Every living thing is in a battle for survival so that its genes can be passed on to future generations. This means that both trees and pathogens are constantly evolving to outsmart each other. But fungi and bacteria can also be beneficial and even necessary for trees, so you can’t just try to kill off every fungus or bacteria as this will destroy the ones that trees actually want and need.
The other thing to keep in mind is that plants have a completely different ‘lifestyle’ to animals in the sense that they are plastic and can grow new tissues, synthesise new compounds and respond to pathogens in a very different way to humans. As noted elsewhere, in response to wounds, trees ‘don’t heal they seal’ and they don’t have an immune system in the same way as animals.
But, there are three ways to help your trees avoid damage from pathogens. The first is to prevent them from being exposed to pathogens in the first place. The second is to remove any pathogens which do take hold. The third is to bolster your trees’ defences so they can fight off the pathogen and its effects.
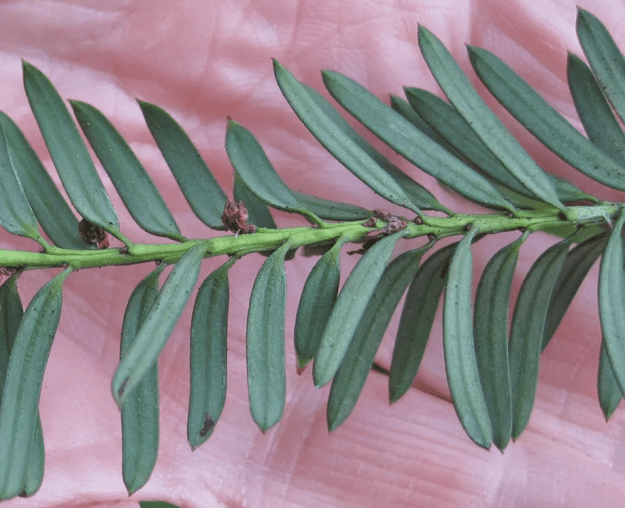
How can you prevent exposure to pathogens? A tree’s first line of defence is its bark, leaf cuticle, and the pectin and lignin in cell walls, which are physical barriers which prevent pathogens from entering its cells.ref Since they can’t run away, this is the main way that trees avoid exposure. But in bonsai we do a heck of a lot of pruning, which unfortunately breaks the physical barrier, leaving the tree vulnerable.
To minimise the chance of nasty microbes attacking your tree as a result of pruning there are some steps you can take. Firstly, practice excellent hygiene and make sure your pruning tools are disinfected regularly, particularly when moving between trees. But be careful that the disinfecting method you use doesn’t damage your tools (carbon steel is particularly vulnerable). Soap and water can work (but dry off the water), or you could use an antimicrobial oil such as tea tree oil (from Melaleuca alternifolia) or oregano oil (from Origanum vulgare) – not only are these antimicrobialref1,ref2 but they also protect steel from corrosion.ref1,ref2
Another approach is to prune during the wintertime. The latter helps because in general most living things are more active in warmer weather – including pathogens. Pruning in winter reduces the likelihood that a pathogen will enter a wound before the tree can seal it off.ref Also many fungi and oomycetes prefer a moist environment, so when pruning try to avoid leaving the wound wet. Angling pruning wounds towards the sun can also be beneficial, since sunlight has disinfecting as well as drying properties (although probably not so much during the wintertime in higher latitudes).ref
Contrary to some advice, wound sealants have not been shown to reduce bacterial or fungal infection on tree wounds.ref This is because a tree wound is not sterile so any sealant can seal pathogens in as well as out. One wonders whether applying an antimicrobial oil to a wound might work, but I cannot find any studies looking into this. Recently I tried applying raw linseed oil to the cut ends of various crabapple branches I was trying to propagate, but these ended up with large communities of mould on them regardless (possibly because I was using high humidity which is perfect for fungal growth).
One interesting pathogen avoidance method is to decouple the seasonal timing between the host plant and the pathogen vector (vector means the delivery method of the pathogen, often an insect). One study found that Dutch Elm disease was avoided by trees which flushed early, since they were not as susceptible to infection after this point.
The second way to help your trees avoid pathogens is to remove them once there. This is tricky since by definition a pathogen is microscopic and impossible to see with the naked eye. You can’t go and squash every bacterium on your tree! It is possible to kill pathogens using antibiotic and/or antifungal substances, but effectiveness varies depending on what you need to remove and usually involves unpleasant and toxic chemicals (such as glyphosate) which also kill good microbes.
Biological control is an alternative to chemicals, this means finding another organism which feeds on or somehow damages the pathogen in question. An example of biological control is the introduction of the Myxoma virus into Australia to control the rabbit population. In trees, the fungus Trichoderma is used as a biological control agent, and it is found in bacterial inoculants for plants such as this one. Species of Trichoderma have been found to be effective against Armillaria root rot (also known as the dreaded honey fungus) and pine pitch canker.ref
The final way to help your trees is to bolster the natural processes they use to resist the negative effects of pathogens. Plants produce a huge range of substances which have defensive effects, and can detect pathogens with surprising speed and specificity. When a pathogen is detected by a plant, it first activates a specific ‘pattern-triggered immunity’ response which is believed to be sufficient to defend against a wide range of pathogens.ref This is known as ‘basal resistance’. A second line of defence detects the so-called ‘effectors’ – substances that pathogens create to avoid the pattern-triggered response. This second ‘effector-primed immune response’ causes cell death at the site, limiting the spread of the pathogenref and is known as the ‘hypersensitive response’. Plants also synthesise a wide range of defensive compounds such as resins in conifers, terpenoids or essential oils, saponins and flavonoids (of which 9,000 are known).ref1,ref2 These help them deter pathogens by making their cells poisonous or unpalatable.
So ensuring your plant is not stressed by lack of water, light or nutrients is one way to help it have the resources to defend itself. Another way is to provide it with beneficial microbes such as mycorrhizal fungi and beneficial bacteria. One study found that providing the bacteria Bacillus cereus to tomato plants enhanced their resistance to pathogens by activating the plant growth hormones salicylic and jasmonic acids. Cultivating a healthy rhizosphere (root microbiome) which supports your tree’s health can be achieved by using a well-aerated soil mix and by not constantly repotting. Repotting risks losing the microbiome which a tree has built up over time, for this reason I always try to add back in some of the previous soil when I repot.
So what should you be doing as a bonsai enthusiast to avoid any nasty pathogens ruining your great work? I’d suggest three things. The first is good pruning practices – minimising wounds, avoiding pruning wounds becoming wet or humid, and vigilance in disinfecting tools and pots. The second is to keep your trees vigorous and healthy – particularly before doing large-scale pruning or defoliation. Give your trees lots of water, nutrients and sunlight to help them bolster their defences. And finally help your trees out with the addition of beneficial fungi & bacteria; products containing these can be found online.